Oh yes! Everything you ever wanted to know about equipment or ask about equipment, this is the place to be! Share photos or ideas about equipment here.
Well I finished up everything on the kegerator conversion for my chest freezer last night, except for the gas manifold. I only have one keg filled with beer right now, so I can do that next.
Here is the chest freezer. 7 cu. ft. holds 4 cornies pretty tightly.
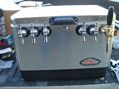
Some of the goodies I got for it. All SS, and Ventmatic faucets. Got that secondary reg for $30 shipped on ebay.
If you didn't seal the seams with silicone, I highly recommend you unplug it, dry it out real well and silicone the seams. Otherwise it'll leak rust into the inside
If you didn't seal the seams with silicone, I highly recommend you unplug it, dry it out real well and silicone the seams. Otherwise it'll leak rust into the inside
You mean just where the collar meets the freezer right? I put a bead of silicone on the top of the freezer, and then put the collar on to keep it in place and seal it up better, and then put a good thick bead all the way around the inside of the seam.
The collar itself also has like 2 coats of primer, 4 coats of paint at least, and about 6 coats of polyurethane clear coat.
maltbarley wrote:Kevin, did you find a good deal on the Perlicks? I'd like to change mine out.
I used the Ventmatic faucets, the cheapest I found was Northern Brewer for $38.99 a piece. I bought most of the stuff there, and figured I would save enough on shipping, and from what I read online people seem to like them more than the Perlicks. http://www.northernbrewer.com/faucets-and-shanks.html
Yeah I saw that on there and contacted him, he admitted that they are the brass lever ones, even though on there he says stainless. And he said he couldn't get any all stainless ones.
Edit: Also, he quoted me $26.95/ea and $7.50 shipping for 4 faucets.
If you didn't seal the seams with silicone, I highly recommend you unplug it, dry it out real well and silicone the seams. Otherwise it'll leak rust into the inside
You mean just where the collar meets the freezer right? I put a bead of silicone on the top of the freezer, and then put the collar on to keep it in place and seal it up better, and then put a good thick bead all the way around the inside of the seam.
The collar itself also has like 2 coats of primer, 4 coats of paint at least, and about 6 coats of polyurethane clear coat.
No I mean the sheetmetal seam inside the freezer. There should be one all the way around where the walls meet the bottom and one vertical one. Mositure will collect and cause it to rust.
Yep. I didn't find that gem of information until mine was well rusted.
The issue is because when the freezer is on, it freezes! So, it forms a lot of ice immediately on the inside surface. But because the internal temp is being held at refrigeration temps, the ice melts and gets into those seams. They are not meant to have water in contact so...................... rust....
Here's Kevin's new drip tray. Took me less than a 1/2 hour to make.
it's 30" long, the bottom comes out 8" and from the tray to the top is 10".
Don't mind the swirls, they'll come off with vinegar prior to painting.
Cheers,
Lyn
Everybody has the right to be stupid. Some people abuse the privilege.
I hope life isn’t a big joke, because I don’t get it.
What I don't Know Far out weighs what I do.


 Become a Brewer's Hardware Fan on Facebook!