First brew on my awesome new Brewer's Hardware system

This is an open forum to discuss all things that just might be on your mind.

Moderators: Post Moderators, Cheers Moderator

User avatar
lexuschris
Posts: 2101
Joined: Sat Apr 25, 2009 7:08 pm
Location: Corona del Mar, CA
Contact:

Re: First brew on my awesome new Brewer's Hardware system

Post by lexuschris »

Brew Day was a resounding success, however it was a very long day! So many little details & changes from my old setup. I got everything clean after dinner, and fermenters setup. However, not everything got put away before bedtime. Finished that up today.

I took some pics during the day, but its too late tonight to put them all up. Here are a few showing off the amazing heat shields around the burners.

Here is the backside of the stand with kettle atop. The lower rear-bar is to help heat vent out the back, rather than the front. While I do not think the heat was on in this photo, it might have been. The flame was burning so clean that it was hard to tell in the daylight.
Drop-back heat venting
dropback_heat_vent_s.jpg (53.52 KiB) Viewed 2886 times
At the end of the day, it was dark enough to observe what was really going on around the burner. The installed heat shields kept the front valve handles & thermometer very nicely shielded. But watch out around the backside!
heatwash completely away from front
BK_heat_wash1_s.jpg (24.99 KiB) Viewed 2886 times
Notice how high the hot blue flame was really getting!
Heatwash neatly up the back
BK_heat_wash2_s.jpg (23.14 KiB) Viewed 2886 times
More later...
--LexusChris
"A woman drove me to drink, and I hadn't even the courtesy to thank her." – W.C. Fields
User avatar
lexuschris
Posts: 2101
Joined: Sat Apr 25, 2009 7:08 pm
Location: Corona del Mar, CA
Contact:

Re: First brew on my awesome new Brewer's Hardware system

Post by lexuschris »

Heyas,

I brewed up 11 gallons of my American Wheat for SCHF on the new rig this Sunday. As much as I thought through everything in the weeks beforehand, I did have to scramble and improvise a few items on brew day. I guess just being able to get the brew done is a good enough accomplishment with all new gear! :beer:

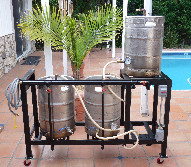
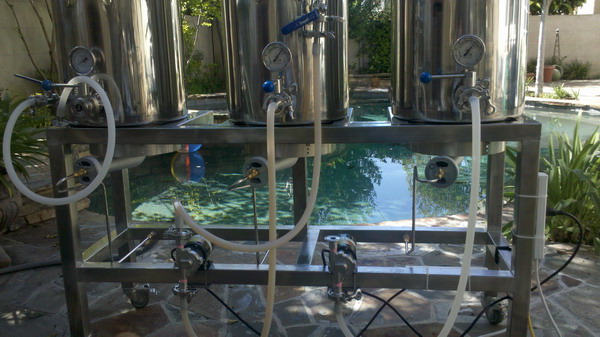
So here is the rig all wired up with hoses ready to go.
Brewstand front
Brewstand front
brewstand_ready_s.jpg (98.08 KiB) Viewed 2866 times
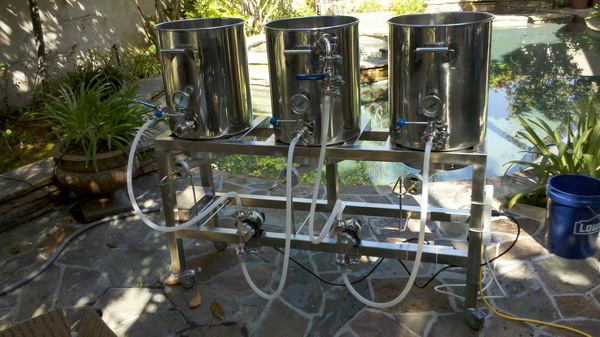
Brewstand 3-4ths
Brewstand 3-4ths
brewstand_ready2_s.jpg (95.82 KiB) Viewed 2866 times
Using pumps was new to me and helped me solve my 2 biggest problems that day. Believe it or not, I had ANOTHER stuck lauter in my new mash tun. I ended up pumping a little bit of my sparge water in thru the outlet and it unclogged it perfectly. I also had a minor issue with my boil kettle, so I just transferred the wort back to my empty HLT and boiled it there.

The chuggers were quiet and FAST! 10 gallon transfers in just over 3 minutes.
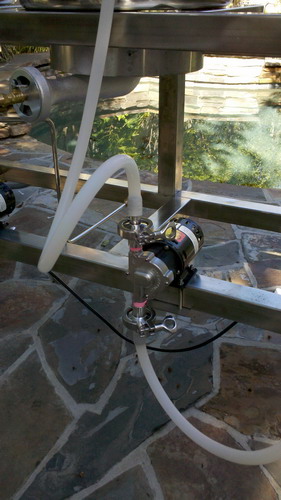
Chugger pump
Chugger pump
chuggerpump_s.jpg (54.36 KiB) Viewed 2866 times
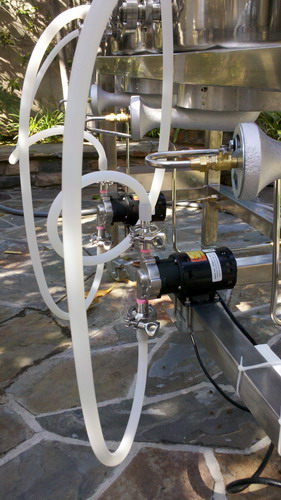
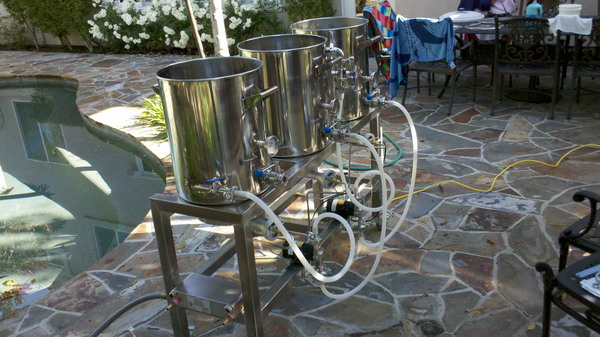
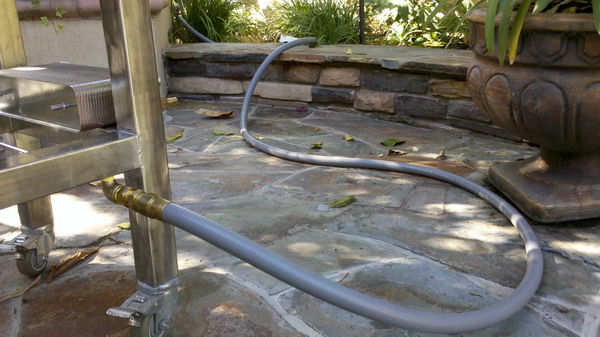
Hoses Clamps etc.
Hoses Clamps etc.
hoses_and_clamps_and_pumps_oh_my_s.jpg (63.02 KiB) Viewed 2866 times
The mash was pretty straight forward. It was great having a solid false bottom with elbow pickup tube. It left just a little bit behind.
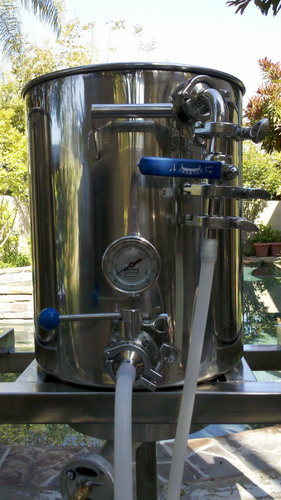
Mash Tun hardware
Mash Tun hardware
Mash_Tun_s.jpg (60.76 KiB) Viewed 2866 times
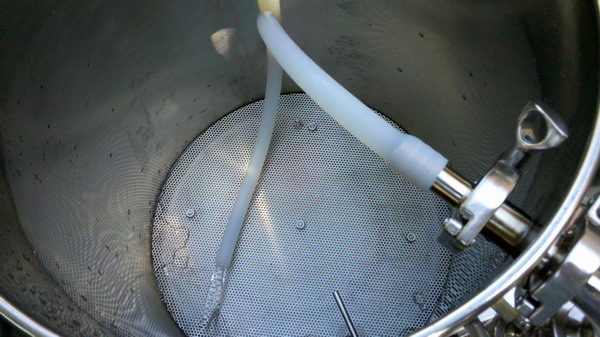
MT False bottom & fly sparge tube
MT_falsebottom_s.jpg (75.73 KiB) Viewed 2866 times
Fly sparging was new to me. I'm glad I got to see JonW's system in action, as I liked the very elegant tubing wraped around/atop the grain bed solution.
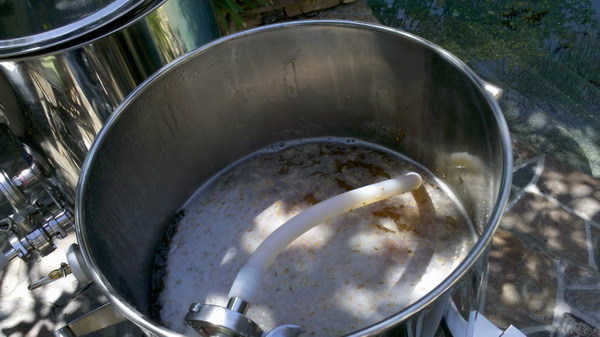
MT fly sparging
MT fly sparging
MT_flysparge_s.jpg (76.15 KiB) Viewed 2866 times
I used the same setup for recirculating the mash. At dough in, I wasn't sure how many degrees to add for heating up my new mash tun, so I followed BeerSmith's lead and added +1. Turns out to be way to low, so I reconfigured to recirculate the mash as I direct fired it. It worked quite well, and once I got my mash up to step temp, I turned it all off and it held steady for half an hour. I also used this for mash-out at 168-F and vorlauf.
Mash Recirculate
Mash Recirculate
MT_recirculate_s.jpg (84.12 KiB) Viewed 2866 times
My plate chiller is perhaps a bit overkill, but I have always hated wasting 30 minutes to wait for my wort to chill to pitching temps. And now at 10 gallons, I just went a tad ... big.
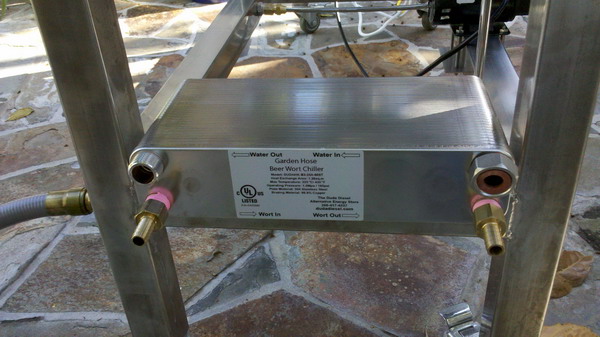
Plate Chiller
Plate Chiller
Plate_Chiller_s.jpg (74.06 KiB) Viewed 2866 times
My calculations showed that it *should* be capable of cooling to tap water temp in one pass, but I didn't believe it. Just seemed like you'd need to recirculate thru it for a while. Well, the output on the 1st pass through was cool to the touch, so I just switched over to filling fermenters.
Plate Chiler hooked up
Plate_chiller_ready_s.jpg (59.6 KiB) Viewed 2866 times
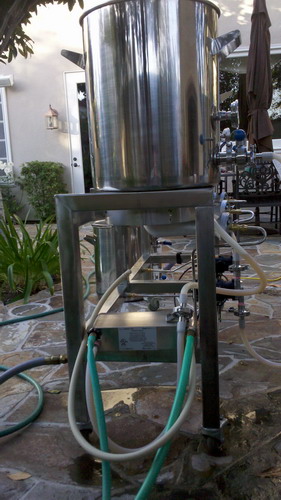
Lastly, while my natural gas needs was fairly well thought out..
Natural Gas Line
Natural Gas Line
NG_gasconnect_s.jpg (82.69 KiB) Viewed 2866 times
My electrical planning was a bit ... ghetto.
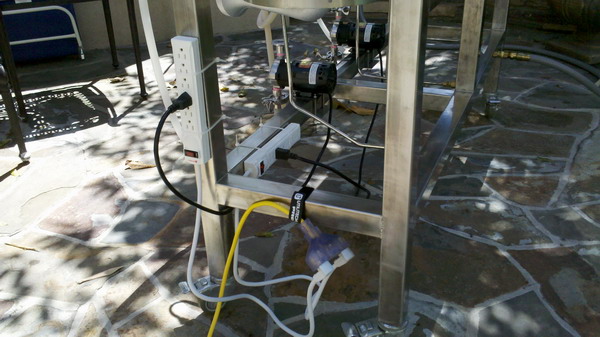
Electrical Wizardry
Electrical Wizardry
ghetto_electrical_setup_s.jpg (81.89 KiB) Viewed 2866 times
I figure eventually, I'll get a brew controller going like some of the other members. For now, I'm looking forward to getting back to just brewing again.

:cheers:
--LexusChris
"A woman drove me to drink, and I hadn't even the courtesy to thank her." – W.C. Fields
User avatar
backhousebrew
Posts: 476
Joined: Tue Nov 17, 2009 8:20 am
Location: Tustin

Re: First brew on my awesome new Brewer's Hardware system

Post by backhousebrew »

Great pics
This must be why brewstands are called "sculptures". That is a work of art.
Congrats on a successful brewday!
Drink Good Beer!
dhempy
Posts: 2357
Joined: Mon May 09, 2005 4:10 pm
Location: Santa Rosa Valley, CA

Re: First brew on my awesome new Brewer's Hardware system

Post by dhempy »

Hey Chris:

Tell me about your NG connect line ... where did you get it, what are the specs ... I need one!

Dan
JonW
Site Admin
Posts: 1157
Joined: Sat Jan 23, 2010 12:21 am
Location: Huntington Beach, CA
Contact:

Re: First brew on my awesome new Brewer's Hardware system

Post by JonW »

Great setup Chris. On your strike water, why not just direct fire it in your MLT? That way you only need to account for grain temp loss as your equipment is pre-heated (and you can tell BeerSmith that).
User avatar
brahn
Site Admin
Posts: 1799
Joined: Wed May 31, 2006 5:12 pm
Location: Tustin, CA
Contact:

Re: First brew on my awesome new Brewer's Hardware system

Post by brahn »

+1 to Jon's suggestion.

What was the problem you had with the boil kettle? I've got the same setup, maybe I've had a similar issue.
User avatar
lexuschris
Posts: 2101
Joined: Sat Apr 25, 2009 7:08 pm
Location: Corona del Mar, CA
Contact:

Re: First brew on my awesome new Brewer's Hardware system

Post by lexuschris »

JonW wrote:Great setup Chris. On your strike water, why not just direct fire it in your MLT? That way you only need to account for grain temp loss as your equipment is pre-heated (and you can tell BeerSmith that).
brahn wrote:+1 to Jon's suggestion.
I didn't even think of that! Guess its leftover thinking from having a plastic cooler for a mash tun. I"m just used to heating in one container, and then moving into the cold empty tun, then adding the grains, etc. Love it! Keep'm coming!
dhempy wrote:Tell me about your NG connect line ... where did you get it, what are the specs ... I need one!
Derrin told me to check out Tejas Smokers online. He also mentioned that ocluke found a good source of NG connect lines, which might be cheaper. However, I was short on time and never got a chance to ask him about his.

I think their hoses are manuf. by another company, as I saw them on a few different sites.. same pic, specs, price, etc. The OEM doesn't seem to sell to retail. I'm sure you could make one on your own; however, I just didn't want to risk my dearth of knowledge on flammable gases on this project.

I wanted a 3/4" hose so that I could (in theory) support 3 burners at once. Also, I wasn't entirely sure how much room I would need to position myself well in the backyard, so a 10' hose seemd a bit limiting. I ordered a custom length 15' hose, 3/4" ID strip-wound hose, with 3/4" MPT and QD male ends.
Image

I then had a certified plumber 'T' off my pool heater's NG line which was 3/4" as well, and install the female quick connect end there (with a ball on/off valve for safety).

When I realized that my lazy measurement of the actual gas input on the brewstand was off, I picked up a 3/4" FPT to 1/2" MPT fitting for the hose end. The 1/2" elbow for the brewstand input was to make attach/detach work easier.

The hose was expensive. Would love to learn how to make those on my own....
--LexusChris
"A woman drove me to drink, and I hadn't even the courtesy to thank her." – W.C. Fields
dhempy
Posts: 2357
Joined: Mon May 09, 2005 4:10 pm
Location: Santa Rosa Valley, CA

Re: First brew on my awesome new Brewer's Hardware system

Post by dhempy »

Thanks ... what size is the main gas line on the stand? Is it also 3/4?

Dan
User avatar
lexuschris
Posts: 2101
Joined: Sat Apr 25, 2009 7:08 pm
Location: Corona del Mar, CA
Contact:

Re: First brew on my awesome new Brewer's Hardware system

Post by lexuschris »

dhempy wrote:Thanks ... what size is the main gas line on the stand? Is it also 3/4?
No, the gas line inside the lower beam is 1/2". I believe the SS tubing going out from there to each burner is 3/8".
K:-)
--LexusChris
"A woman drove me to drink, and I hadn't even the courtesy to thank her." – W.C. Fields
User avatar
DrDually
Posts: 461
Joined: Thu Dec 31, 2009 3:23 pm
Location: Santa Ana, CA

Re: First brew on my awesome new Brewer's Hardware system

Post by DrDually »

NG runs at 4 oz pressure so a small line may limit flow to burners. I suggest at least 3/4" flex line from gas supply line to sculpture
Chris aka Dr Dually
drdually@att.net

Life is tough. It is even tougher when you are stupid. John Wayne

Bottled and enjoying: Nada, zip
Kegged: English Brown, American Amber, Double Barrel Ale
Next up: Kolsch
felipe
Posts: 2
Joined: Fri Sep 21, 2012 4:40 am

Re: First brew on my awesome new Brewer's Hardware system

Post by felipe »

Looks pretty good. At what rate did you get this and wanna know more about its specifications.
_______________________
User avatar
lexuschris
Posts: 2101
Joined: Sat Apr 25, 2009 7:08 pm
Location: Corona del Mar, CA
Contact:

Re: First brew on my awesome new Brewer's Hardware system

Post by lexuschris »

felipe wrote:Looks pretty good. At what rate did you get this and wanna know more about its specifications.
Just check out the link above ... lots of specs and options. Know that I've used my system a bit, I could have just used the 1/2" hose at 8' length for $46 ... but sometimes you just gotta go big or go home..
:D
--LexusChris
"A woman drove me to drink, and I hadn't even the courtesy to thank her." – W.C. Fields
User avatar
rex
Posts: 20
Joined: Fri Jul 30, 2010 11:09 am
Location: Irvine, CA

Re: First brew on my awesome new Brewer's Hardware system

Post by rex »

Chris this looks awesome, I'm starting to price out a very similar build and will likely be calling Derrin soon on the hardware.

Your sculpture looks very similar to the Brutus 10 - did you build it off of those plans? I'm still trying to figure out how I'll get the stand built as I don't know how to weld. Also you mentioned a 3/4" NG gas line in the sculpture but from some of the pics it almost looks like you have a gas beam. How did you configure the gas lines? I too plan on running NG likely with 3 banjos.

I'm hoping to come to a club meeting soon, came to a few a couple years ago but then things like getting married and having a baby got in the way ;-) Hoping to build a new setup soon and get back to brewing!

-Dave
-Dave
User avatar
lexuschris
Posts: 2101
Joined: Sat Apr 25, 2009 7:08 pm
Location: Corona del Mar, CA
Contact:

Re: First brew on my awesome new Brewer's Hardware system

Post by lexuschris »

rex wrote:Chris this looks awesome, I'm starting to price out a very similar build and will likely be calling Derrin soon on the hardware.

Your sculpture looks very similar to the Brutus 10 - did you build it off of those plans? I'm still trying to figure out how I'll get the stand built as I don't know how to weld. Also you mentioned a 3/4" NG gas line in the sculpture but from some of the pics it almost looks like you have a gas beam. How did you configure the gas lines? I too plan on running NG likely with 3 banjos.

I'm hoping to come to a club meeting soon, came to a few a couple years ago but then things like getting married and having a baby got in the way ;-) Hoping to build a new setup soon and get back to brewing!

-Dave
Welcome back to brewing!

When you talk to Derrin, ask him about the design of the stand... it is his build. There is a gas line inside the steel square beam, so my hose just connects to that pipe. Keeping it inside the beam is just for cosmetics. The gas stays inside the piping.

Hope to see you at the next meeting!
--LexusChris
"A woman drove me to drink, and I hadn't even the courtesy to thank her." – W.C. Fields
User avatar
rex
Posts: 20
Joined: Fri Jul 30, 2010 11:09 am
Location: Irvine, CA

Re: First brew on my awesome new Brewer's Hardware system

Post by rex »

Sounds good, I actually ended up calling brewers hardware this afternoon and am going to stop by and check their stuff out sometime this week.

When is the next merting?
-Dave
Post Reply